Some questions were asked regarding what I do and how I do it by the delightfully inquisitive zukoxme on another thread. I thought it might best to answer it here since these merchandise ‘items’ deal more with Photoshop than the other thread does.
I have a question alternatecoppa.
Actually, many.
A) Do you use Photoshop Elements?
B) If so, how do you cut pictures and paste them into different bodies? Like remove the background?
C) How do you change colors of outfits of the Gaang?
I use the full version of Photoshop CS2 and am eagerly awaiting the release of CS3 for my Intel Mac. Yup that’s right, I’m a steadfast Mac user, always have been and yes, we
are very trendy, hip and condescending just like those “I’m a Mac” TV ads.

The other Apps I use almost on a daily basis in my work are Adobe After Effects Pro, Final Cut Pro, DVD Studio Pro & I’m learning Shake. I don’t use Photoshop Elements because I use more of the higher-end filters & effects of the full version. But I suspect you’re asking if I use Elements because you’d like know if you can do the same things I’ve been doing here on the forum which leads us to…
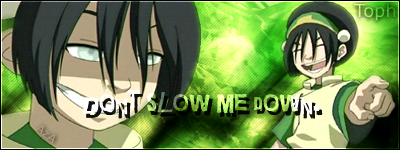
B) The steps I use when it comes to cutting and pasting heads & the like can be done in Photoshop Elements just as well as in the Pro version. Let’s have a look at my Zuko dance sig:
 Step 1:
 Search for your screenshot. I find just about all of mine from Avatar Spirit.Net (as I imagine almost everyone else does too). Here was one with shaggy-hair-Zuko with just the right look that I wanted. When I look for head shots and I'm not particularly in need of a specific expression, I try to find a shot that the contains the whole head in the frame (not cut off on the top or bottom) and as large as possible in that frame since it gives me the option of scaling it down to whatever size I need without a loss in resolution.
Step 2: I notice that most of the screenshots from ASN are captured darker than they appear on screen. So (in this case especially) to help me see the seperation between Zuko’s hairline and the dark wall behind him I’m going adjust the
Levels.
Step 3: The white arrow on the Levels slider controls the amount of light, the middle arrow is the midtones, and the black is the of course the dark levels. I’m going to adjust the white arrow (the light levels) to the histograph (the jaggy-black mountain peak-like lines) so that it brightens up the picture again. Don’t go too far or you’ll blow out your colors.
Step 4: Next comes the head extraction. There are lots of ways to do this ranging from simple to very complex but more accurate. Since I’m going to be scaling this head down from the size it is now, I’m going to use the simplest method- which is one that I know you can do in Elements. It’ll look kinda rough at full size, but when you scale it down the rough edges will be unnoticeable.
Select the
Polygonal Lasso Tool and start clicking and pulling the lasso around the edges of his head, hair and neck. I won’t go on and on about how to use the tool, just try it out for yourself and you’ll see how easy it is to use. Just keep going around your subject’s head & be sure to get in all the little jigs and jags. Go slow and make lots of clicks around rounded edges to keep them looking smooth.
Once you’ve done that, meet back up with your first lasso point and close it up. An animated dash line should appear around the head.
Step 5: Next use the
Cut (or
Copy) command to lift it out of the background.
Step 6&7: Paste it into whatever new file you want & there you go. You’re now a head-hunter ;D
For the body I used a photo of a full-body tux model to draw over. It's not cheating! It's called using a reference & there's still plenty of room to put your own input into it.


For example, you'll see I didn't like the odd way
Mr.Model-Fancy-Pants was standing so I flipped his legs horizontally. I then faded the image a bit to allow me to see the 'toon tux I was going to paint over it. The same lasso tool was then used to roughly outline the model photo and I then used the
paint bucket tool or
Fill command to fill in the lassoed shape. I then added the extracted head from above onto the newly painted body. Oh yeah, I also gave Zuko a little smile with the
paint brush just so
I wouldn't have to look all emo for the evening too.
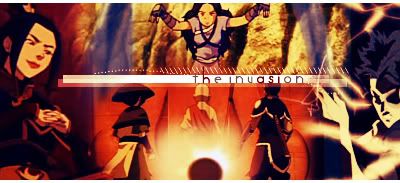
The Katara body I did was made in a much more complicated way. I made it from scratch by scanning a rough drawing I drew and then filled in on top of that using
Vector Graphics. Those are a whole other ball of wax and don't know if Photoshop Elements has them. I could write a book on how to use them and I don't want do that right now, but here's a pic that gives you an idea of how it builds up:
(Note: This is before PE & I decided on Blue for the dress color )C) Color correction and shifting is
the key to making your head (or whatever) look like it's in the right lighting for the location it sits.
Let's look at the Katara head:
Step 1: After cutting out and pasting the head like I demonstrated above, the first thing you want to do is to get the skin tone matching the body. Call up the
Adjust > Hue & Saturation controls and adjust the sliders until you find a satisfactory result. This helps match up the color & lighting and makes the head look like it really does belong on our newly created body.
Step 2: Use that wonderful Lasso tool again to select just the portions of the head you want to change colors on-
In this case the head piece. Then, open up the
Hue & Saturation controls again and move them across the spectrum of possible colors until you find a shade that you like.
Really the name of the game is experimentation. Keep playing with the levels & colors until you find what works best for you.
Hope that answers your questions...

Cuz' after all that, it's nap time for alternatecoppa! ;D


 ;D
;D


 I'm not sure if it's the same. And I have a PC too.


